RVs are one of the most convenient vehicles on the market. However, it’s not prone to leaking and damage. Especially a leaking leveling jack may induce a lot of stress.
So, how can you fix the RV hydraulic leveling jacks leaking?
To fix a leaking leveling jack you first need to identify the place of the leak. After that, you need to clean the area of the leak and replace the worn-out parts. Finally, start the RV to see if the leak has stopped.
Still not clear about the whole process? Keep on reading to know about the step-by-step method of fixing a leaking leveling jack.
How Do Hydraulic Leveling Jacks Work?
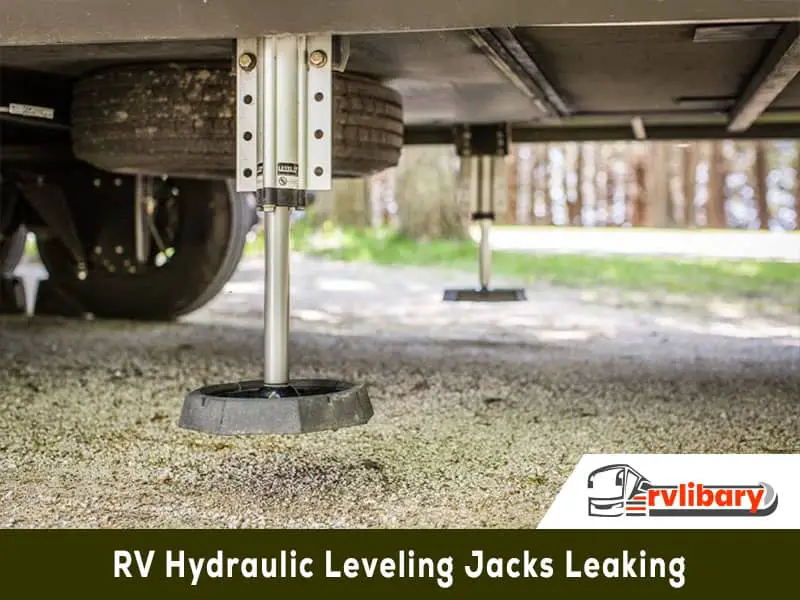
Leveling jacks are one of the most significant parts of an RV. It’s responsible for keeping your RV balanced at a steady angle.
Hydraulic leveling jacks function by using liquid or hydraulic pressure. There’s a tube inside this leveling jack that is filled with fluid. These jacks also contain springs.
The fluid inside the tube creates hydraulic pressure. As a result of this pressure, the springs on the jack get extended. Similarly, during low pressure, the jacks get down to their original place.
Now that we know how a hydraulic leveling jack works let’s look into the issues caused when leaking.
Problems Caused by Leaking Leveling Jacks
Hydraulic leveling jacks are essential for any RVs to operate properly. However, leaking leveling jacks can cause a plethora of complications.
The main function of a leveling jack is to level your RV properly. Now a leaking leveling jack will hinder your RV from leveling and balancing properly.
Sometimes a leaking leveling jack may also cause your refrigerator to not work properly. In addition, there can be a lack of hot water pressure in your RV.
Lack of fluid in leveling jacks can cause it to not extend and retract properly. On top of that if the temperature goes down, the jacks will freeze and get stuck. This is a particularly annoying problem.
Fixing Leaking Levelling Jacks
From the previously mentioned topics, we have come to know everything about the leveling jacks and the problems caused by leaking. So now how can we fix it?
Here is a step-by-step instruction that will guide you through the process.
Step 1 of 4: Identifying the Leak
The first step to fixing a leak is to identify the area of leaking. As the leveling jack is an intricate system, it may get difficult for you to identify.
Usually, there are two common places that tend to leak more than the other areas. These are the hoses and the tubes.
Simply watch for pools of liquid underneath the hoses or tubes of your RV leveling jacks. A pool of liquid will affirm your suspicion of leaking.
Carefully check each of the jacks of your RV one by one to determine the leak. If you find a leak then move to the next step.
Step 2 of 4: Cleaning the Pooling Liquid
The place of leakage will always have pools of liquid underneath it. Especially if the leak is too massive.
To fix your leak you need to clean this liquid mess. First, start by opening the RV doors. Then using a mop, get rid of all the liquid on the ground.
Sometimes due to low temperature, the leaking jacks might freeze. In this case, pour warm water on the base to make sure any more leaks don’t get frozen and the jacks are freely movable.
Step 3 of 4: Fixing The Cause of Leak
Now that you’ve identified and cleaned the area you need to take different steps depending on the area of the leak.
First, let’s start with hoses.
Hoses
The main function of a hose is to carry the liquid from the tube to the jacks. Thus, it creates water pressure. Now if the hose gets damaged your jacks won’t extend properly.
Unfortunately, you can’t fix a damaged hose. So your best bet would be to replace it with a new hose. You can find good-quality hoses online or in hardware stores near you.
Tubes
Most of the time the leaks that appear in tubes occur at the junction between the hose and tube. At this connection point, there is a rubber component known as the O-ring.
When these O-rings come off or lose their function a leak may occur. To fix this type of leak you need to change the O-ring. The nuts in the joints will tighten and stop liquid from leaking if the O-ring is replaced.
Discard the worn-out O-ring and put the new one in place. After that, use a good rubber seal conditioner to add the finishing touches.
Step 4 of 4: Testing
Once you’ve replaced all the worn-out hoses and tubes you need to check if the new ones are working properly or not.
Start by turning your RV on and checking if the leveling jacks are working properly. If your RV is properly balanced and doesn’t move to the side your leveling jacks are fixed.
In the meantime watch out for pooling liquid. If you see a small amount of liquid pooling then use a leak transmission repairing liquid. This will handle small amounts of leaks successfully.
These are the ways you can fix your leaking hydraulic leveling jacks.
FAQs
Q: Can you replace the hose inside your leveling jacks yourself?
Answer: Yes, you can replace the hose yourself. However, if you’re new to all of this then hiring a professional would make the process easier.
Q: Should you leave your leveling jacks down in the winter?
Answer: No, you should not leave your leveling jacks down in the winter as there is a risk of freezing.
Q: What fluid is used in hydraulic jacks?
Answer: Jack oils are used in hydraulic jacks to lift heavy objects.
Conclusion
With that, we’ve reached the end of our segment. If you have any more questions on RV hydraulic leveling jacks leaking, feel free to comment down below.
Till next time. Best of luck!