Having a functional and properly sealed toilet in your RV is essential for a comfortable and sanitary experience during your travels. However, over time, the toilet seal may wear out or become damaged, leading to leaks and unpleasant odors.
Replacing the RV toilet seal can seem like a daunting task, but with the right tools and step-by-step instructions, you can easily replace the seal and restore the functionality of your RV toilet. In this article, we will guide you through the process of replacing your RV toilet seal.
Materials Required
Before starting the replacement process, gather the following materials:
- New RV toilet seal
- Adjustable wrench or pliers
- Screwdriver
- Bucket or towels (to catch any water)
- Rubber gloves (to protect your hands)
- Cleaning supplies (to clean the toilet and surrounding area)
Step-by-Step Guide
Follow these steps to replace the RV toilet seal:
- Shut off the water supply: Locate the water supply valve behind the toilet and turn it off to stop the flow of water to the toilet.
- Empty the water tank: Flush the toilet to empty any remaining water in the tank and bowl.
- Disconnect the water supply line: Use an adjustable wrench or pliers to loosen the nuts connecting the water supply line to the toilet tank. Once loosened, remove the water supply line.
- Remove the toilet: Unscrew the bolts that secure the toilet to the floor using a screwdriver or wrench. Gently lift the toilet off the floor and place it on a towel or in a bucket to prevent any water or debris from spreading.
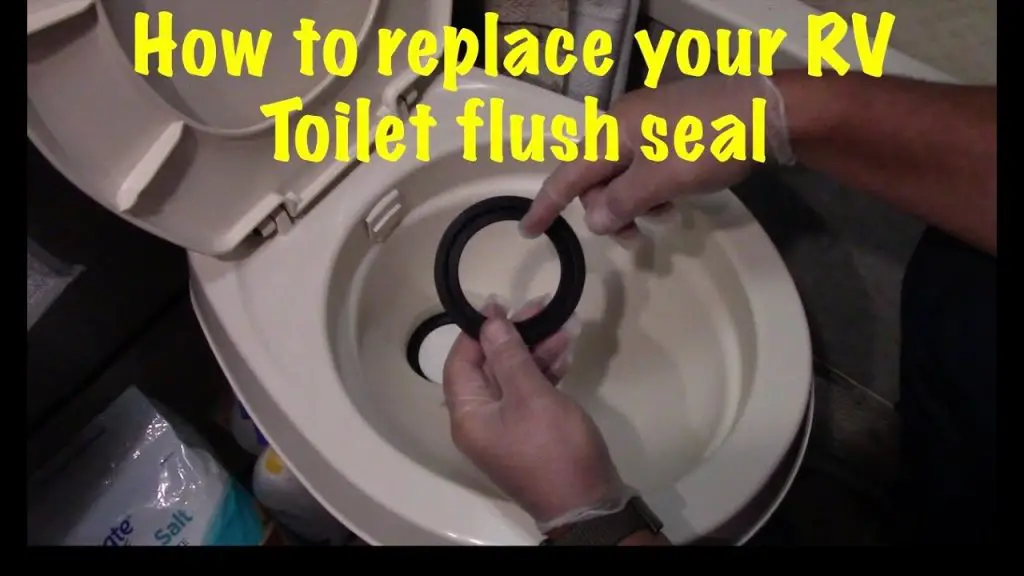
- Access the toilet seal: Locate the old seal between the base of the toilet and the flange on the floor. Carefully remove the old seal and dispose of it properly.
- Clean the area: Thoroughly clean the base of the toilet and the flange using cleaning supplies to ensure a clean and smooth surface for the new seal.
- Install the new seal: Take the new RV toilet seal and position it around the flange, ensuring a proper fit. Gently press it down to create a seal between the toilet and the flange.
- Reinstall the toilet: Lift the toilet and carefully align it with the bolts on the floor. Once aligned, lower the toilet onto the new seal. Apply gentle pressure to ensure a secure fit.
- Tighten the bolts: Use a screwdriver or wrench to tighten the bolts that secure the toilet to the floor. Be careful not to overtighten, as this could cause damage.
- Reconnect the water supply line: Attach the water supply line to the toilet tank and tighten the nuts with an adjustable wrench or pliers.
- Turn on the water supply: Finally, turn on the water supply valve to allow water to flow back into the toilet tank.
- Check for leaks: Flush the toilet a few times and inspect for any signs of leaks. If you notice any leaks, tighten the bolts or nuts accordingly.
By following these steps, you can easily replace the RV toilet seal and ensure a functioning and leak-free toilet in your RV. Regularly inspect and maintain your toilet seal to prolong its lifespan and avoid any inconvenient leaks during your travels.
Remember to wear rubber gloves and take proper safety precautions throughout the process. If you are uncertain or uncomfortable with performing the replacement yourself, it’s advisable to seek professional assistance.
Frequently Asked Questions On How To Replace Rv Toilet Seal
How Do You Know If Your Rv Toilet Seal Needs Replacing?
If you notice water leaks or unpleasant odors coming from your RV toilet, it’s a sign that the seal may need replacing.
What Are The Common Causes Of Rv Toilet Seal Damage?
The most common causes of RV toilet seal damage are wear and tear over time, improper cleaning, or using harsh chemicals.
Can I Replace The Rv Toilet Seal By Myself?
Yes, replacing an RV toilet seal is a relatively simple task that can be done by most RV owners with proper instructions and a few basic tools.
What Tools Do I Need To Replace The Rv Toilet Seal?
To replace the RV toilet seal, you will need a new seal, a wrench or pliers, a screwdriver, and possibly some lubricant or silicone grease.
How Often Should The Rv Toilet Seal Be Replaced?
The RV toilet seal should be replaced every 1-2 years, or sooner if you notice any signs of damage or leaking. Regular maintenance can prevent costly issues down the line.