
“Can you paint over RV decals?” That’s the question we set out to answer when we began our research. What we found might surprise you.
People say decals are best for graphics adhesion, but experts claim otherwise. When your RV travels through the sunniest and roughest terrains, its graphic decal gets at risk of fading away.
The excessive sunburn on the decal causes it to peel off gradually, making your RV fences look like some faded walls of an old house.
So, the best solution that specialists suggest is to restore the previous decal through a meticulous process of a paint job. According to them, Vinyl decals offer flexibility to paints if followed a proper guidelines. With a thin layer of paint over these decals, you can maintain the vibrant look of your RV exterior.
Can You Paint over Decals on an RV
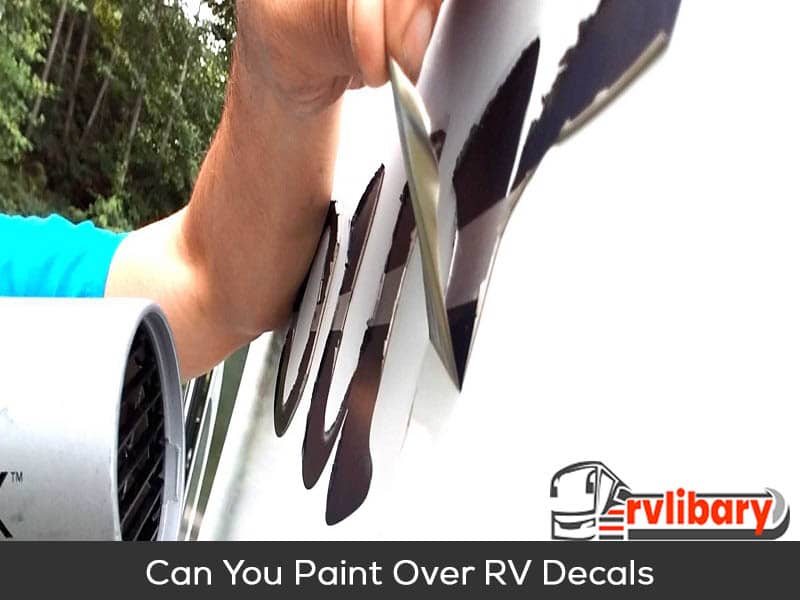
As mentioned earlier, painting over RV decals isn’t as tricky as you think. The only thing that matters is whether or not you use branding decals. Branding decals, such as Vinyl decals, conform efficiently to the painting process without any sticky residue.
What Makes RV Decals Fade
A decal will last several years on the vehicle’s exterior for most RVs. Sun damage from exposure and fading are among the most significant causes of RV decal deterioration.
The sun can eat away at the colors in your RV decals. Also, it can bleach or remove the colors from many materials. Even if your windows are tinted, some UV rays still get through, which can cause damage to your decals.
Also, cheap decals are another main reason that causes the quick fading of its beauty. When buying decals, you have to make sure you’re getting the best quality decals out there. Otherwise, they might not last as long as you’d like them to.
How to Paint Decals
Wash any dirt off the decal with a water-based soap using a sponge. Using a moist rag, thoroughly rinse the decal. If you’re going to dry it with a towel, be sure it’s clean. If not, it’ll leave lint on the decal.
Dip the decal into the sand. Use fine 220-grit sandpaper and rub in a circular motion to smooth out bubbles and bumps. Pay special attention to edges if you have a die-cut shape. This will take off the excess paper, which will give your sticker the best chance of adhering.
Next, take a painter’s tape to cover the decals areas. Place the sticker on flat, smooth surfaces. Use your paintbrush to brush the vinyl edges with a latex-based primer, creating a seal around the outside.
This prevents the adhesive from becoming so tacky that it bonds with your wall before you can apply it.
Use a soft polyester paintbrush apply one coat of paint to the decal. You can also use a paint sprayer to paint it. Use gentle pressure and let it dry for an hour or two.
Then again, apply a couple of coats of paint using the same method. This will ensure that the decal is protected from water and sun damage. Do not allow the paint to pool or drip under the decal. It causes bubbling or peeling.
How to Take Care of Painted Decals
Caring for your painted decals is just as important as painting the RV itself. First and foremost, you must obtain actual paint jobs.
There are numerous ways to do this but don’t use the same techniques on ordinary automotive paints. Be careful about the things listed below during your painting process,
- An unprimed decal will result in paint peeling.
- An unabraded decal will result in finish flaking.
- A decal sanded with a grit lower than 220 will result in delamination.
- Cheap vinyl decals are always adhesive to fading.
- Using a hair dryer to dry decals warp the design and damage the fabric.
- Specific automotive paint, plastic paint, acrylic paint, enamel paint, and more works best depending on the type of decals.
When you’re done painting, there are tips you can use to keep your decals looking fresh. One of the most important things you can make sure your decals don’t get direct sunlight.
After you’ve finished painting, Keep your painted travel trailer decals undercover. Cover it with a thin pile of material so harsh substances cannot harm the exterior.
Frequently Asked Questions
This segment highlights the answers to the most asked questions regarding RV decal painting. We hope this information aids you in finding some solutions as well.
Can I spray paint decals?
Indeed, you can. Spraying over decals is an effortless way to paint them. However, be considerate when choosing the spray paint quality. Otherwise, you will risk destroying your RV’s entire graphic decal.
How do you paint a decal on a motorhome?
It doesn’t have to be difficult to apply decals to your RV. With spray paint, you can cover an entire motorhome in a couple of hours. There’s no need to worry about brush strokes because applying spray paint is quick and easy — and it ensures that your entire motorhome is adequately covered.
How do you redo RV decals?
Wipe away dirt or mold with water and a soft cloth if your decals are soiled. Once you’re done, rinse the decals off with water and let them dry. After the decal is thoroughly dried, wipe it with rubbing alcohol to redo the decal’s paint once again.
Wrapping Up
Painting over decals can be a quick fix for worn appearances. It is a cost-effective solution for a lot of people out there. As an RV enthusiast, one of my recent DIY projects involved customizing the decals on my 5th wheel.
Rather than replacement decals, I opted to paint over the existing ones to restore their appearance and match the original design. We hope you’ve enjoyed reading this article. It gives you a glimpse into how you can easily apply paint to your RV decals.
